Using PIPE 5
Below find step by step instructions for using PIPE. Click on the navigator to the right to jump to a specific section.Using the GUI
When PIPE first opens a blank canvas is created where you can draw create a Petri net. All the basic actions for creating and modifying Petri nets can be found using the task bar along the top of the application. These same actions can also be accessed by the drop down menus at the top. A list of Petri net analysis modules can be found to the left of the canvas.
Note on a Mac all shortcuts involving Ctrl should replaced with the Cmd option below.
Create a new Petri net 
Create a new Petri net by pressing the new icon, by pressing Ctrl-N, or choosing the new Petri net option from the File menu. A blank canvas will appear where you may create your Petri net using the other actions detailed below. Your new Petri net will be given a default unique name until you save it. You can navigate through all open Petri nets by clicking on the desired Petri net's name in the tab bar above the canvas.
Open an already existing file 
To open an existing Petri net, click the open icon or press Ctrl-O. Your opened Petri net will then be loaded into a canvas that takes focus on the screen.
Save an existing Petri net 

To save an existing Petri net click the save icon, use the save menu option or press Ctrl-S. The save-as option is also available from the task bar, menu or by pressing Ctrl-Shift-S. Once saved your Petri net will be renamed in the tab bar to the name just entered for saving.
Close the current tab 
To close the current tab press Ctrl-W or click on the close icon.
Editing a Petri net
A Petri net can be built up by using the appropriate icons along the task bar.
Adding a token 
In order to add a token to the Petri net click on the new token icon or press Ctrl-Shift-T. This will pop up the token editor window in which tokens can be added by giving them a name and a color.
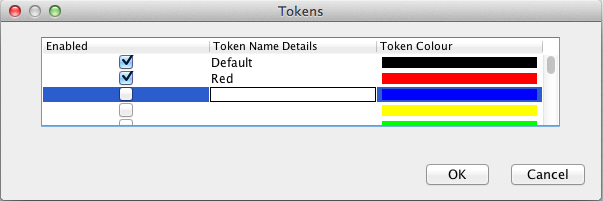
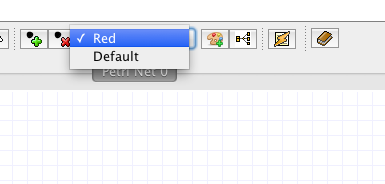
The active token can be changed via the token drop down menu.
Adding and editing a place 
The place component tool be selected by clicking the icon with a round circle.
Once selected click anywhere on the canvas to create a new place in this location. The place will be automatically named for you.
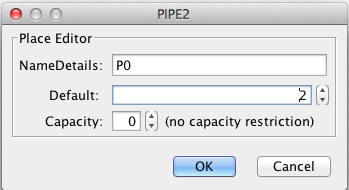
In order to edit place attributes, such as it's name and capacity, right click the place and click 'Edit Place'. The place editor window will then pop up where you can enter the new details for the Place.
The active token can be added to or removed from places by selecting the relevant icons next to the active token menu 
 . In order to change which token is added, select the token you wish to place from the menu, then click on the place to add tokens. Alternatively adding tokens can be done in the place editor window as seen above.
Adding and editing a Transition 

Similarly a new transition can be added by clicking either the black rectangle which represents an immediate transition, or the unfilled rectangle which represents a timed transition. The transition can then be created anywhere by clicking on the canvas. It is automatically named, just like when adding a place.
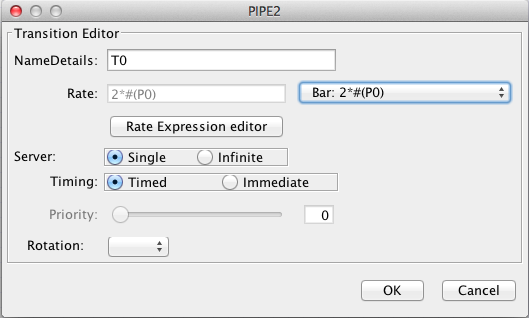
Right clicking on a transition and clicking 'Edit Transition' allows you to edit the transitions attributes and swap between a timed or immediate transition.
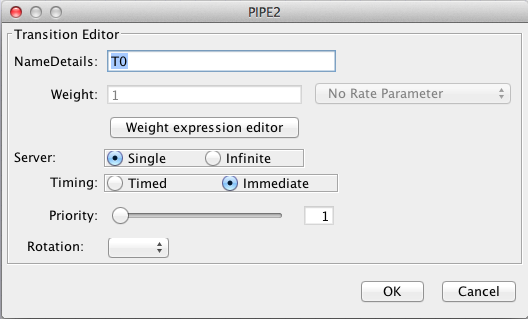
A timed transitions rates may either be static or functional.
Adding and editing an Arc 

Click on either the normal arc (pointed arrow head), or the inhibitor arc (round arrow head) icon and then select the components you wish to join.
A normal arc can join either a place to a transition or a transition to a place. An inhibitor arc can only join a place to a transition and will only fire if the place contains no tokens.
When adding an arc clicking on free space within the canvas will add points along the arcs path, shift clicking will create curved points. Pressing Esc whilst creating an arc will cancel it's creation.
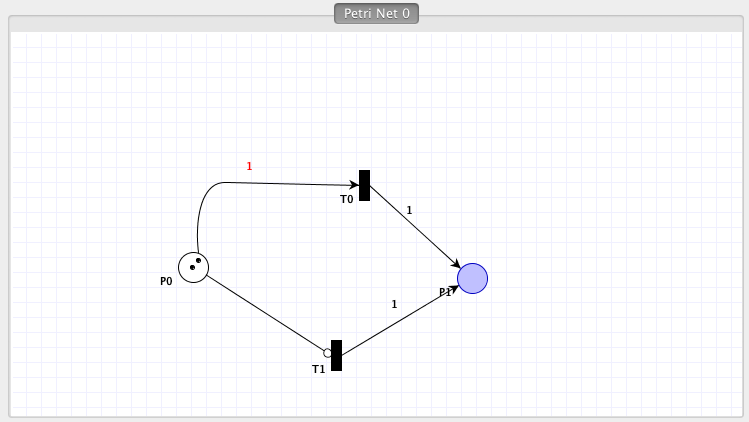
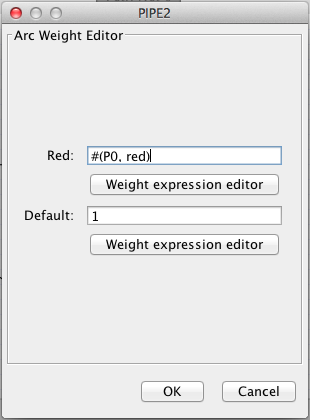
Again the number of tokens an arc requires can either be static or functional. You can edit the arcs weight by right clicking on the arc and selecting 'Edit Weight'. This brings up the weight editor where a weight can be added for each token declared.
Adding a Rate Parameter 
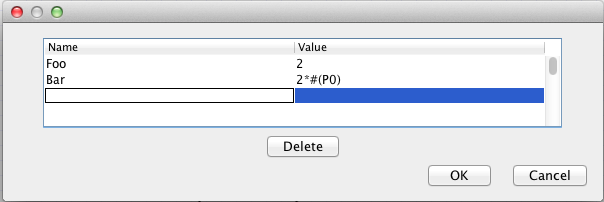
Rate parameters are useful because they allow you to create a shared rate for timed transitions. Modifying this rate will effect any transitions that reference this rate. Click on the rate parameter icon along the task bar and enter a name and value for this rate.
This rate can now be selected in the transitions editor window.
In a similar manner rate parameters can be deleted from the Petri net. Any transitions that make use of this rate parameter will have their rates set to the parameters value at the time of deletion.
Functional Rates
Supporting marking-dependent rates helps create more expressive Petri nets whilst keeping the design simple. Arc weights and transition rates can now be expressed in terms of other components. Functional rates have the following grammar:
   program            ::= expression;
   expression         ::= '(' expression ')' |
                           expression * expression |
                           expression / expression |
                           expression + expression |
                           'ceil(' expression ')'  |
                           'floor(' expression ')' |
                           capacity                |
                           token_number            |
                           token_color_number      |
                           INT                     |
                           DOUBLE;
   capacity           ::= 'cap(' ID ')';
   token_number       ::= '#(' ID ')';
   token_color_number ::= '#(' ID ',' ID ')';
Where an ID refers to a place name, or in the case of token_color_number a place name followed by a token name.
Examples
Examples of functional weights using the grammar are given in the table below.
| Expression | Meaning |
|---|---|
#(P0) |
the sum of all tokens in P0 |
#(P0, Default) |
the number of Default tokens in P0 |
#(P1, Red)*10 |
the number of red tokens in P1 multiplied by 10 |
floor(10.5/3) |
the floor of 10.5/3 i.e. 3 |
ceil(cap(P5) * 2.5) |
the ceiling of the capacity (max number of tokens allowed) in P5 multiplied by 2.5 |
#(P0) + #(P2) |
the sum of the total number of tokens in P1 and P2 |
Animating a Petri net
Animation mode 
You may toggle animation mode for a given Petri net by clicking on the animation mode button. This mode changes the tool bar along the top to contain useful tools for animation. It also displays the animation history on the left hand side of the screen.
Firing a transition 

Enabled transitions are highlighted in red in animation mode and there are three different ways to fire a transition:
- Clicking on the transition you wish to fire.
- Clicking on the random transition button (single lightening bolt). This randomly picks a transition based on priorities and type to fire.
- Clicking on the multiple animate button. This will ask you how many transitions you wish to fire and the time between firing. It will then randomly select the transitions to animate.
Stepping backward/forward 

The backward and forward buttons are located next to the random firing buttons on the tool bar. Press these to step forward and backward through the animation history.
Analysing the Petri net
At this present time all modules have been disabled in PIPE 5. For more information please read the what's changed section.